
Squarespace Scheduling: The Ultimate Guide for Small Business Owners
Being a service-based business can be daunting. Apart from managing the day-to-day business transactions, you'll have to ensure that your clients have a seamless and positive user experience when booking appointments.
So, you wonder, how can I automate my booking process so that clients can go to a page, select the time they prefer for the service, and make payments without waiting long hours or coming to the physical shop (if there is one) to make inquiries?
If this is your dilemma, then congratulations! You don't have to worry about appointment booking once you have Squarespace Scheduling. It takes care of all your appointments, makes it easy for clients to book appointments, and allows you to customize your services based on various factors. So, keep reading if you are ready to know more about Squarespace Scheduling and how to set it up on your website.
Note: Squarespace Scheduling isn't limited to Squarespace sites. You can use it on any website without hassle.
Squarespace Scheduling: Easy Video Tutorial for Beginners
First, what does Acuity or Squarespace Scheduling do?
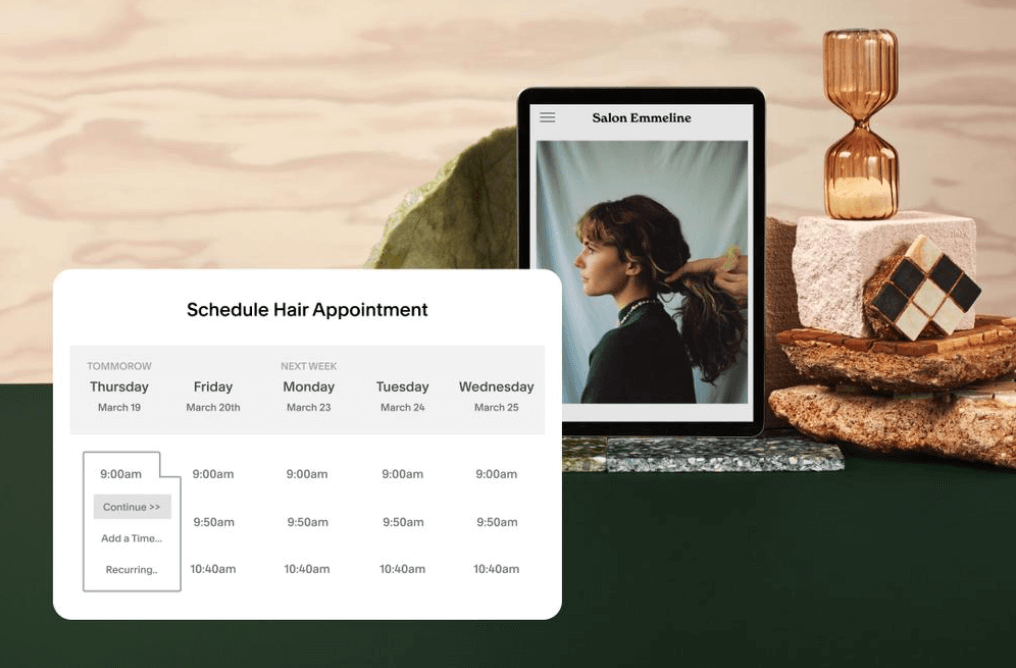
Squarespace Scheduling is an online appointment-scheduling software that allows service-based small businesses to 'sell' their services by making it easy for clients to schedule appointments on a website or through a link without having to chat with a representative or go to a physical shop. In other words, it is a Client Self Scheduling platform that allows them to book appointments.
At the end of the spectrum, it makes managing appointments and schedules easy for business owners and automates the process to increase sales and reduce stress.
With Squarespace scheduling, you can create multiple calendars and appointment types, set available hours, add pre or post-paid services, customize intake forms, send reminders, and so much more. You can also keep track of your client's inflow and make informed decisions.
Is Acuity Scheduling a Squarespace company?
The central question when Squarespace Scheduling and Acuity come up is whether they are the same.
Acuity was founded in 2006 as a scheduling software for small businesses. It comes with all the required features for scheduling and managing appointments. However, in 2019, Squarespace bought Acuity to expand its software base, and ever since then has become a Squarespace company.
However, Acuity still maintains its website, which means you can log in to Acuity to signup for their service or access it directly from your Squarespace dashboard (if you have a Squarespace site).
To elaborate further, Acuity and Squarespace Scheduling are basically the same and offer the same features. The only difference is that one can be accessed through Squarespace's dashboard and another through the Acuity site. If you already have an Acuity account, you don't have to worry about signing up for Squarespace Scheduling because it is owned by the same company.
Squarespace Scheduling Pricing

Squarespace or Acuity Scheduling comes in different packages that were intentionally tailored to the sizes and growth of the business. Each service is differentiated by the number of calendars you can access and other features. Let's take a look.
There are three plans for Squarespace scheduling; Emerging, Growing, and Powerhouse.
Emerging - $16/month (paid annually)
This plan is perfect for service businesses that are just starting and have a few services to offer. You have access to
One Calendar:
You have access to one calendar where clients book appointments. This is perfect for someone offering a few services and building a client base, but it may not be effective for bigger businesses.
Calendar Synching:
Sync your appointment calendar with other calendars, such as Google, Microsoft Outlook, etc., to ensure that you don't miss out on essential appointments that have been booked.
Custom Payment Setting and Card Vaulting:
Squarespace Scheduling allows you to accept payments from different options such as Paypal, Stripe, Square, etc. In addition, you can create a custom payment setting to accept deposits, tips, etc. Squarespace Scheduling also allows card vaulting making it easy and secure for clients to repurchase.
Invoices:
Manage invoices all in one place. Send invoices to your clients, enabling them to pay online on any device.
Automatic Reminder:
Clients are busy and may often forget their upcoming appointments. Fortunately, you can send reminders to their email or phones with the automatic reminder support feature on your Squarespace Scheduling page.
Growing - $27/month (paid annually)
You get all the features in the Emerging plan.
2 to 6 calendars
SMS/Text Reminder:
On the previous plan, you only get to send reminders to their email, but you can make it more personal and up close with an SMS reminder on the Growing plan
Packages, Gift Cards, Subscriptions, or Gift Certificates:
Squarespace Scheduling allows you to upsell services to your clients during appointments and will enable them to purchase several packages simultaneously. It is also a great way to sell more, make customers, and give them a seamless experience.
Powerhouse - $49/month (paid annually)
All packages included in the previous plan
Multiple time zones for staff/locations: If you manage a group of staff that works remotely or client/staff in multiple locations, you can set your calendar to multiple time zones.
Custom API: Certain customizations require code snippets. Though Squarespace has a lowkey no-code policy for building a website, since they want it to be accessible to anybody without a programming background, you can still make any custom features to your Squarespace Scheduling page.
HIPAA (BAA): For US-based companies, you can add an extra layer of security to the data being exchanged on your platform by signing for a BAA with Squarespace Scheduling to satisfy the need to become HIPAA compliant company.
Try Squarespace Scheduling in a 7-day trial.
If you are unsure whether a Squarespace Scheduling Subscription is perfect for business, the best thing to do is sign up for the 7-day trial. Doing this will allow you to use all the features, integrate them into your website, and decide whether to commit or strike out. Unfortunately, Squarespace or Acuity Scheduling doesn't have a free version, so you get a 7-day free trial.
How To Get Started With Squarespace Scheduling (Step-by-Step Guide)
Sign Up for Squarespace scheduling.
The first thing you want to do when starting with Squarespace Scheduling is sign up. All you need to do is to head over to Squarespace Scheduing and register. Once you've done that, you can opt-in for a free trial or pay for one of its plans.
If you want to use the Acuity website instead, you only need to head to Acuity Scheduling and follow the login process. Either way, you'll be welcome with a payment plan or free trial to opt-in for. When doing this, it is best to consider your
budget
the size of your business, and
your growth margin
However, remember that you can upgrade at any point or cancel your subscription.

Set Up Calendar
Once you finish the first step, it is time to get your hands dirty and start working on the nitty-gritty things, such as setting up your calendar. You'll be welcomed with preliminary questions such as your store name, general hours, etc. You only need to answer these questions, and Squarespace will set up the foundation.
Set Your Availability
Availability is the hours your business is open to accept appointments and attend to customers. Therefore, it is an important process that requires certainty so that you won't have to start canceling on clients because there wasn't careful consideration in the first place.
Squarespace will ask you to set the hours of availability that clients can opt in from. Once you set your availability hours, it will be visible for any client scheduling appointments.
The good part about setting your availability is that you can edit it anytime, so you're not stuck with a fixed time. To do this, go to the Squarespace Scheduling homepage, and select Availability. You'll see two options; Calendar and Rooms. Select Calendar.
You can either edit specific days or change the availability hours entirely.
One thing you have to know is that you can set multiple hours depending on your need. You can set regular weekly hours or different daily hours. For example, you can set a straight hour, such as 8 AM - 5 PM. Setting this means that clients can book at any hour between 8 AM - 5 PM.
If you want to leave some time out to rest before taking another appointment within the hours, you can set these hours using commas. For example;
8 AM - 2 PM, 3 PM - 5 PM
This means that appointments can start by 8 AM and end at 2 PM, and another can only start by 3 PM to 5 PM.
Other things you can do in addition to setting up your availability are;
Scheduling Limit: The scheduling limit allows you to set how far clients can book appointments, when they can cancel or reschedule an appointment, and when clients can edit the intake form once it has been filled. The scheduling limit can be global (which means it applies to all calendars and appointment types) or calendar-specific.
Suppose you want to edit your global scheduling limit, head to your dashboard and open the Availability Panel. You'll see global scheduling. Click on that, and you can make the necessary edits.
Create Appointment Types
Once you've set up your calendar, input your availability hours, and incorporated some limitations, it is time to create appointment types. An appointment type is a specific type of appointment with its cost, duration, unique service features, availability span, and limitations.
On Squarespace, you can create appointment types or group classes (this is specifically for course creators that hold group training and classes). Creating Appointment types is necessary if you have multiple services, and it also allows clients to explore the appointment types you are offering and make the right decision.
Setting an appointment type is easy. What you need to do is to access your Scheduling dashboard and click on 'Appointment Types.' You'll be taken to another page displaying the previous appointments you've set up and two buttons that state' New Type of Service' or 'New Type of Group Class.' Once you've selected your preferred option, an explanatory form will appear, and you can fill in the necessary information.
You can add a longer description to your new appointment, import pictures, display a message after scheduling, and more.
Another feature is that you can set your appointment types to private so that other clients won't see it on your Squarespace website, except if they are sent a link. You can also set different availabilities for various appointment types, which means specific appointments will only come up when you want them to. This feature is exceptional because it allows you to set up a signup period and give you control over your services.
Edit Rooms and Resources
If you have a service that requires a specific place or item for execution, you'll find the rooms and resources feature handly. For instance, let's say you run a salon with a limited amount of staff and rooms; then you can input the number of resources (team) you have, so as each client book, one is being deducted from the resource numbers. When the appointments equal the number of resources you set, Squarespace Scheduling will automatically stop the client from making appointments.
To add a resource or room to your Squarespace Scheduling;
Head over to the Scheduling page and click on the Availability panel
Select Rooms/Resources
Click the New Resource button
Edit the name and include the number of resources. Remember also to add the appointment type they apply to.

Upload Clients' information
Although clients' information is automatically added to the list when they book an appointment, you can also add clients' information manually or by uploading a spreadsheet.
Some of the information you'll have access to as Squarespace automatically uploads booking clients' information are
Their intake forms
Contact information
Appointment history
Client notes from staff
Upcoming appointments
Suppose you want to add a single client. All you need to do is to head over to your dashboard and click on Clients. Enter the client's necessary information and save by clicking the Add Client button. You can also export your clients' information by uploading a spreadsheet. To learn more about how to do this, read this Squarespace guide.
You can also manage your clients list and upload clients' information. Some of the things you can do are;
View Client's profile
Ban or edit client's information
Search for specific client profiles using particular information like name, phone number, email address, etc
You also get the chance to filter clients by their time period.
Duplicate or merge clients' profile
Add detailed notes about each client if needed.
Delete Clients' details.
Upload Intake Forms if necessary
Apart from the regular email, phone address, and client name, you can add custom intake forms to your appointments to gather more information or ask your client for some terms and conditions.
Some useful questions you may ask on your intake forms are who referred them, if they have ever taken a similar service before, and other specific questions.
To create a custom intake form, head to the sidebar and select Intake Form Questions.
On Squarespace scheduling, you can create a new custom form, create terms and condition form, or a New SOAP form. However, since you are creating a custom intake form, the option to select will be New Custom Form.
Two options are available; upload a file or fill the question in yourself using the form provided by Squarespace.
Squarespace makes it easy by allowing you to fill up the necessary questions you want to ask, and add various options like a drop-down list, checkbox, yes/No Choice, and so on. So, you get to choose how you want your client to answer. You can also create an intake form for internal use only. In other words, it won't be visible to your clients.
Squarespace scheduling allows you to allocate the created forms to specific appointment types.

Set Up Reminders
Squarespace scheduling allows you to send appointment notifications to your clients at different times. Not only will it remind clients that they have an appointment coming up, but it is also a way to show your brand's value and professionalism.
Depending on your preferences, you can send appointment notifications via email or SMS (on higher plans). Also, you can customize these notifications to be sent out after specific actions have been carried out. For example, you can send notifications when
Confirmation of appointment
Appointment reminders at specific periods
Post-appointment follow-up, e.g., survey
Cancellation confirmation
Rescheduling appointments
Order Confirmation, etc.
If you'd like to send an email for a different action, Squarespace scheduling allows you to create custom emails. All you need to do is to head over to your dashboard and select 'Client Email.' Once you do that, you'll see various notification options and the actions you can take. All you need is to add whatever information you have and set a time to do that.
Squarespace also allows you to add a custom feel to your forms to make them more professional but straightforward.
Sell Subscriptions, Gift Cards, and Packages
Fortunately, you don't have to worry about selling subscriptions, gift cards, and packages with Squarespace Scheduling. This is one of the advanced features of this scheduling software that others don't have. Clients can also purchase packages and subscriptions from one place as they book appointments. Doing this will help you drive more sales and increase a positive customer experience.
Fortunately, adding these items to your scheduling block is fine too. Head to your Scheduling page and select "Packages, Gift Cards, and Subscriptions." If you already have some listed packages and gifts, you'll see them on the new page, and you can add new appointment packages. Specifically, you'll see three action buttons: New Appointment Package, New Gift Certificate, and New Subscriptions. Depending on the package you want to add, select your preferred choice.
Once you do that, you'll be able to add all the information that is needed for the package or subscription. Information like category, costs, description, and expiration are all available. You can also determine the appointment type you'll add to the packages.
Set Up Payment Options
The last important part of setting up your Scheduling calendar is setting up payment options. The more accessible customers can pay for appointments and packages, the better the user experience. Fortunately, Squarespace understood the assignment and ensured seamless payment options were available at your disposal.
Squarespace Scheduling allows your customers to book and pay for appointments at one place; in other words, they don't need to be redirected to a whole different page or follow some steps before they can get a tie booked. This feature makes life easier for your customers and helps you build a robust user experience.
Coming to payments, Squarespace allows three major payment processors, which are Paypal, Square, and Stripe. So, you can log into your payment account through Squarespace Scheduling, and it will be automatically connected to your calendar.
Also, you can set up payment terms for your clients. You can allow your client to pay in installments, pay in full, drop tips, and much more.
Squarespace payment processes are straightforward, so you have nothing to worry about.
Customize Your Scheduling Look
Once you've set up everything on your Scheduling page, it is time to customize it to represent your brand and look professional. Fortunately, Squarespace is the king of template designs, so the scheduling software is no different. You can perform a series of customization actions on your page, such as
Adding a logo
Choosing custom accent colors
Add a custom pop-up page
Add a QR code
Make custom alterations and customization using CSS, etc.
To get started with customizing your Scheduling page's look. Head over to the Squarespace dashboard and select 'Customize Appearance,' You will be welcomed with three categories to make different customizations.
Appearance
This category allows you to change the logo, accent colors, appearance, and calendar copy.
Scheduling Page Options
You can choose the information you want displayed to your clients, such as a checkbox for recurring appointments, specific appointment information that will be shown during scheduling, and other information like time slots.
Advanced CSS: This is where you can make edits and customization using code. This feature is only available on the Powerhouse plan.
Sync Scheduling Appointment to your Calendar
Keep track of your clients appointments on your personal work calendar with Squarespace Scheduling. It allows you to sync your Calendar (on any platform) with the appointment calendar. So, you get a notification when a client books an appointment, and the appointment is automatically added to your Calendar.
To sync your calendar(s) with Squarespace Scheduling, head to the sidebar menu, click Calendar Syncing, and fill in the necessary information. Once that is done, you can keep track of your appointments anywhere and anytime.
related article: 25 Best Squarespace Templates For Virtual AssistantsAdd A Scheduling Page to your Website
Once you finish everything, you can easily add a scheduling block on your website or send direct links to your clients.
related article: 21+ Contract Templates For Freelancers (Designers, Consultants, And Entrepreneurs)Adding a Scheduling Block
You can either create a standalone scheduling page on your website or embed a scheduling button or block to your website. If you have a Squarespace website, then it is more straightforward; you can easily add a scheduling block to your website's page. Find out more here.
On Squarespace Scheduling, you can add a booking button to your website, a booking bar on specific pages, or an embedded scheduler to a desired page. You can read this guide to find out more.
If you don't want the public to access your scheduling page easily, you can create a link and send it to specific customers that need to book. You can send a direct link that leads to your scheduling page or one that leads to specific appointment types and services.
To generate a link, go to Scheduling Page Link on your dashboard. Squarespace will display the link generated for your general scheduling page. You can decide to customize the URL to fit more into your brand. At the latter part of the page, you'll see a drop-down menu where you can choose to generate the link for the general page or specific appointment types.
related article: Squarespace Pricing Plans: A Complete GuideOptional: Add Integrations
Squarespace doesn't leave you hanging with third-party apps; it lets you get the best out of its platform by providing popular integrations for your scheduling page. Sometimes, you need Integrations to take your scheduling page a step further and make life easier for your client. Some integrations you can add to Squarespace Scheduling are
Automate.io
ConvertKit
Google Analytics
Zapier
Xero
related article: Squarespace Domain Review: Everything You Need To KnowWrapping Up
Managing a business can be stressful and challenging to keep track of your appointments, especially as your business grows. Fortunately, Squarespace or Acuity Scheduling is available to take that problem away. In this guide, we've explained all the features available and how to set up your appointment Calendar on Squarespace. I hope you found this article helpful!
related article:Squarespace Review: Is It Really Worth The InvestmentFAQ
Can I accept payments through Squarespace Scheduling?
Yes. Squarespace Scheduling comes with different payment options; Stripe, Paypal, Square, and Apple Pay.
related article: 12 Best Squarespace Alternatives To Build A WebsiteCan I integrate Squarespace Scheduling with my existing website?
Squarespace Scheduling works with any website. All you need to do is to subscribe to any plan, head over to the dashboard and find a way to integrate it with your existing website. Learn more here
related article: How To Choose The Right Squarespace Website Template For Your BusinessCan I customize the look and feel of my scheduling page on Squarespace?
Squarespace allows you to have a unique Scheduling look. You can change the color, and fonts, add logo, and make other customizations to fit your brand. To start with customization, head over to the Squarespace dashboard and select Customize Appearance.
related article: Squarespace Vs Shopify: Which Platform Is Best For Your Business?Does Squarespace Scheduling offer automatic reminders and confirmations for appointments?
Automatic reminders come with every plan on Squarespace Scheduling. You can send automatic reminders by text (on higher pad plans) or email. Also, Squarespace gives you a chance to send notifications when certain options have been completed, such as booking an appointment, rescheduling, etc.